How to Bleach-Dye Your Clothes
So tie-dye is officially back. Or people are really really bored in quarantine. Or both! I tried out bleach dyeing recently and it was super easy and fun! Easier than regular tie-dye. I am SHOCKED people are spending $50+ on buying it when you can make it yourself. I have some suggestions to make yours better than mine, which I will share at the end. And if you want to see how I did regular tie-dye, click here.
What you need:
- What you want to bleach: old t-shirts, sweatshirts, tank tops, sweatpants, etc. Walmart had cheap sweatshirts for $3, so that's where I got mine! Make sure it's more than 50% cotton material because it won't bleach well otherwise (stay tuned).
- Bleach and water solution (50% bleach, 50% water)
- Rubberbands
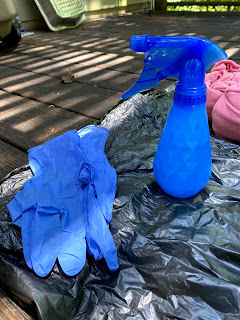
- Gloves (to protect your hands from the bleach)
- An open workstation. For example: the outdoors. Don't do this in your bathroom unless you want to die of inhaling chemicals.
Step 1:
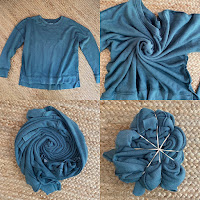
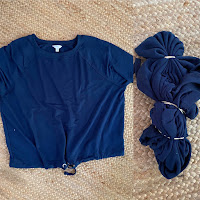
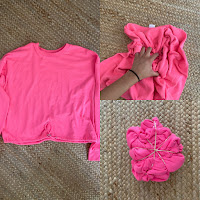
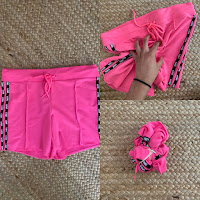
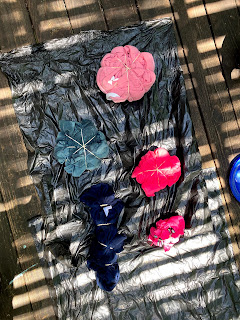
Tie your clothes with the rubber bands to however you want them to look. I looked up a couple of designs online. I decided one "spiral", two random (matching set), and one heart design. If you want to do the heart, here's the instructions on how to do it! Click here.
Spiral (left) and Heart (right)
Random for both the top and shorts
Step 2:
Dampen your shirts with water. You can do this before or after tying your shirts. The last time I tie dyed (check it out here), I soaked the shirts beforehand because I used actual dye and I wanted to make sure the color was absorbed properly, but I don't think it matters! I thought it was easier and quicker to just spray them with water this time around.
Step 3:
Start bleaching your shirts! I think it's easiest to have the bleach solution in a spray bottle because you can precisely spray where you want the bleach, but it doesn't matter. Whatever works for you!
Step 4:
Wait about 10 minutes for the bleach to soak into the material or when you see the color change. Don't wait too long because bleach can eat away at cotton. Then rinse out the bleach in water till it's all out.
Step 5:
Put your clothes in the washing machine and dry them.
Step 6:
You're done!! It's super easy. You can see how each turned out below.
As you can see, the bleach did not work on the pink because I learned AFTER the fact that it was 100% polyester. It worked on the top a little bit, but overall, I did not like how the pink set turned out as you can tell by my face, lol. I absolutely hated the shorts from the beginning and thought the bleach would have helped. But the other tops turned out well!
The blue was probably my favorite and turned out the best out of the three. And you can see the heart shape in the middle!
I loved the green sweatshirt, but as y'all can tell, the spiral design didn't quite make it to the center of the shirt lol.
As you can see, the bleach did not work on the pink because I learned AFTER the fact that it was 100% polyester. It worked on the top a little bit, but overall, I did not like how the pink set turned out as you can tell by my face, lol. I absolutely hated the shorts from the beginning and thought the bleach would have helped. But the other tops turned out well!
I loved the green sweatshirt, but as y'all can tell, the spiral design didn't quite make it to the center of the shirt lol.
Suggestions to make it better (in my opinion):
- I think it looks better randomly tied up everywhere versus doing a pattern. I messed up the spiral because the bleach didn't reach the center of the shirt properly.
- That being said, however you do it, make sure that the bleach reaches the the front and center of the shirt! You don't want the bleached effect to be just on the sleeves.
- Do not use clothes that aren't cotton! My pink shirt and shorts were 100% polyester and I didn't realize it till it was done and nothing changed. It worked a little, but it just looks like it got wet, lol.
- I got a huge headache, my eyes were watering, and my nose was running at the end of this. If you're sensitive to bleach, I'd wear a mask or completely do this outside.
Happy crafting! Let me know in the comments or on Instagram how yours turned out!
Check out my last tie-dye project: Easy 70s Halloween Costume
Check out my last post: Average Girl Makeup: Blue Halo Eye (plus new youtube video!)
FOLLOW ALL MY SOCIALS:
Instagram: https://www.instagram.com/sarthellabra/
Twitter: https://twitter.com/sarahtabraham
Pinterest: https://www.pinterest.com/stabraham/
Youtube (main channel): http://www.youtube.com/SarahAbraham09
Youtube (2nd channel): http://youtube.com/glambitiousarah
TikTok: https://www.tiktok.com/@sarahtabraham (I'M VERY ACTIVE ON TIKTOK!!)
TikTok: https://www.tiktok.com/@sarahtabraham (I'M VERY ACTIVE ON TIKTOK!!)



Comments
Post a Comment